The Ultimate How-to: Build a Bluetooth Swift App With Hardware in 20 Minutes
In a previous tutorial,
you learned how to add Bluetooth to a Particle Xenon application. That
way you could control the onboard RGB LED from a test app like nRF
Connect or Light Blue Explorer.
In this post, we're going to take
it one step further. We're going to develop a Swift app to control a
Particle Mesh RGB led. If all goes well, you should have a working app
in about 20 minutes!
Let's get started.
Don't have time right now to read the full article?
Once everything is installed, let's get to the fun stuff!
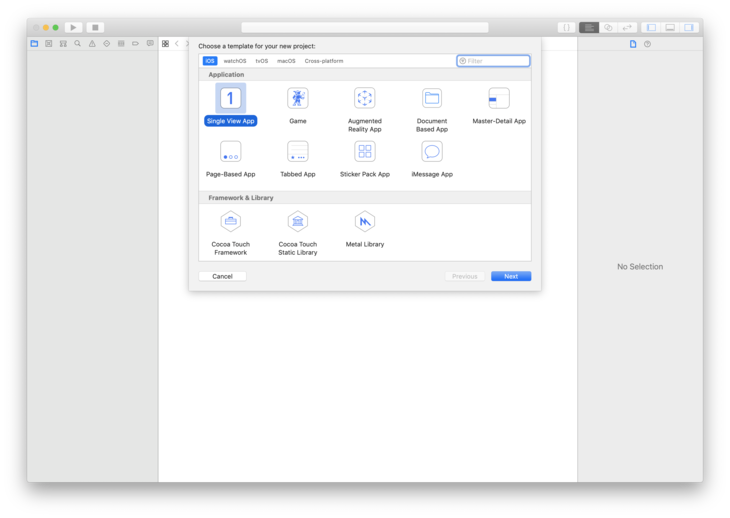
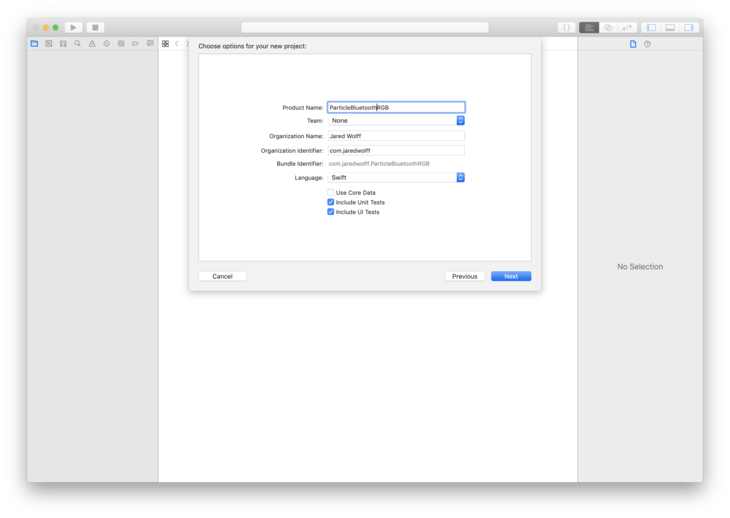
Open Xcode and go to File → New Project. Select Single View App. Then update the Project Name to be to your liking. I've also changed my organization identifier to com.jaredwolff. Modify it as you see fit!
Select a location to save it.
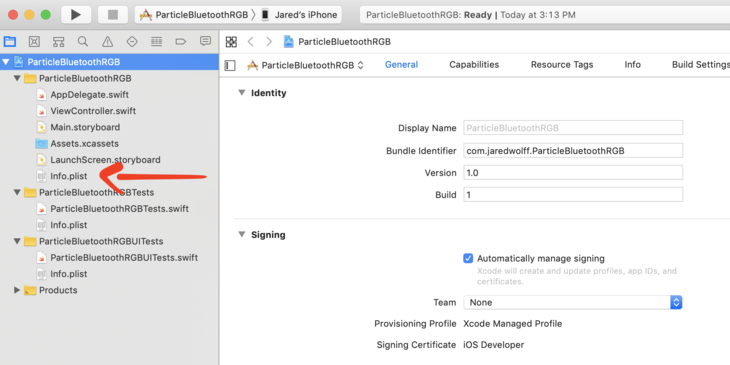
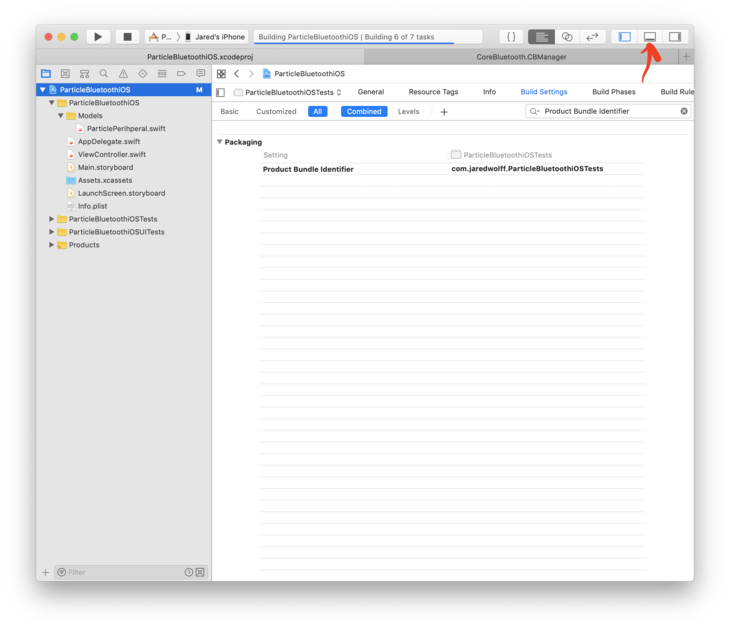
Next find your Info.plist. Update info.plist by adding Privacy - Bluetooth Peripheral Usage Description
The description I ended up using was App uses Bluetooth to connect to the Particle Xenon RGB Example
This allows you to use Bluetooth in your app if you ever want to release it.
Now, let's get everything minimally functional!
Minimally functional
Next, we'll get a minimally functional app to connect and do a services discovery. Most of the action will happen in the ViewController.swift.
Lets first import CoreBluetooth
importCoreBluetooth
This allows us to control the Bluetooth Low Energy functionality in iOS. Then let's add both the CBPeripheralDelegate and CBCentralManagerDelegate to the ViewController class.
Setting delegate: self is important. Otherwise the central state never changes on startup.
Before we get further, let's create a separate file and call it ParticlePeripheral.swift. It can be placed anywhere but I placed it in a separate 'group' called Models for later.
Inside we'll create some public variables which contain the UUIDs for our Particle Board. They should look familiar!
importUIKitimportCoreBluetoothclassParticlePeripheral:NSObject{/// MARK: - Particle LED services and charcteristics Identifierspublicstaticlet particleLEDServiceUUID =CBUUID.init(string:"b4250400-fb4b-4746-b2b0-93f0e61122c6")publicstaticlet redLEDCharacteristicUUID =CBUUID.init(string:"b4250401-fb4b-4746-b2b0-93f0e61122c6")publicstaticlet greenLEDCharacteristicUUID =CBUUID.init(string:"b4250402-fb4b-4746-b2b0-93f0e61122c6")publicstaticlet blueLEDCharacteristicUUID =CBUUID.init(string:"b4250403-fb4b-4746-b2b0-93f0e61122c6")}
Back in ViewController.swift let's piece together the Bluetooth bits.
Bluetooth bits
Everything
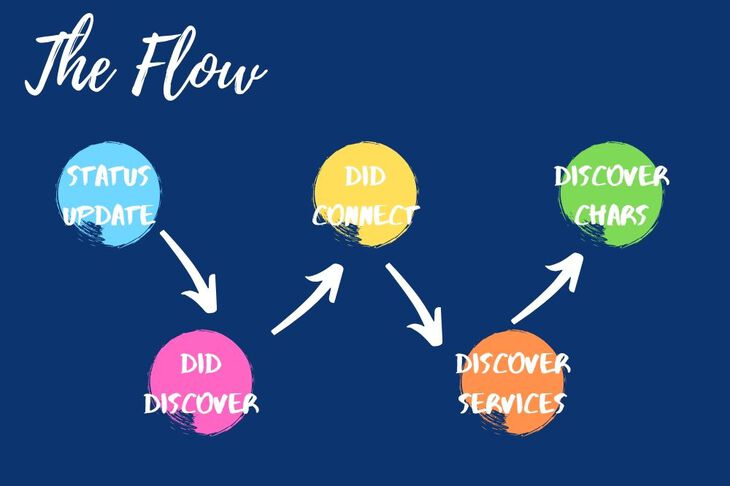
to do with Bluetooth is event based. We'll be defining several
functions that handle these events. Here are the important ones: centralManagerDidUpdateState
updates when the Bluetooth Peripheral is switched on or off. It will
fire when an app first starts so you know the state of Bluetooth. We
also start scanning here.
The centralManagerdidDiscover event occurs when you receive scan results. We'll use this to start a connection.
The centralManagerdidConnect event fires once the device is connected. We'll start the device discovery here. Note:
Device discovery is the way we determine what services and
characteristics are available. This is a good way to confirm what type
of device we're connected to.
The peripheraldidDiscoverServices event first once all the services have been discovered. Notice that we've switched from centralManager to peripheral now that we're connected. We'll start the characteristic discovery here. We'll be using the RGB service UUID as the target.
The peripheraldidDiscoverCharacteristicsFor
event will provide all the characteristics using the provided service
UUID. This is the last step in the chain of doing a full device
discovery. It's hairy but it only has to be done once during the
connection phase!
Defining all the Bluetooth functions.
Now
that we know what the functions events that get triggered. We'll define
them in the logical order that they happen during a connection cycle.
First, we'll define centralManagerDidUpdateState to start scanning for a device with our Particle RGB LED Service. If Bluetooth is not enabled, it will not do anything.
// If we're powered on, start scanningfunccentralManagerDidUpdateState(_ central:CBCentralManager){print("Central state update")if central.state !=.poweredOn {print("Central is not powered on")}else{print("Central scanning for",ParticlePeripheral.particleLEDServiceUUID);
centralManager.scanForPeripherals(withServices:[ParticlePeripheral.particleLEDServiceUUID],
options:[CBCentralManagerScanOptionAllowDuplicatesKey:true])}}
Defining the centralManagerdidDiscover is our next step in the process. We know we've found a device if this event has occurred.
// Handles the result of the scanfunccentralManager(_ central:CBCentralManager, didDiscover peripheral:CBPeripheral, advertisementData:[String:Any], rssi RSSI:NSNumber){// We've found it so stop scanself.centralManager.stopScan()// Copy the peripheral instanceself.peripheral = peripheral
self.peripheral.delegate =self// Connect!self.centralManager.connect(self.peripheral, options:nil)}
So, we stop scanning using self.centralManager.stopScan(). We set the peripheral so it persists through the app. Then we connect to that device using self.centralManager.connect
Once connected, we need to double check if we're working with the right device.
// The handler if we do connect succesfullyfunccentralManager(_ central:CBCentralManager, didConnect peripheral:CBPeripheral){if peripheral ==self.peripheral {print("Connected to your Particle Board")
peripheral.discoverServices([ParticlePeripheral.particleLEDServiceUUID])}}
By comparing the two peripherals we'll know its the device we found earlier. We'll kick off a services discovery using peripheral.discoverService. We can use ParticlePeripheral.particleLEDServiceUUID as a parameter. That way we don't pick up any services we don't care about.
Once we finish the discovering services, we'll get a didDiscoverServices event. We iterate through all the "available" services. (Though there will only be one!)
// Handles discovery eventfuncperipheral(_ peripheral:CBPeripheral, didDiscoverServices error:Error?){iflet services = peripheral.services {for service in services {if service.uuid ==ParticlePeripheral.particleLEDServiceUUID {print("LED service found")//Now kick off discovery of characteristics
peripheral.discoverCharacteristics([ParticlePeripheral.redLEDCharacteristicUUID,ParticlePeripheral.greenLEDCharacteristicUUID,ParticlePeripheral.blueLEDCharacteristicUUID],for: service)return}}}}
By this point this is the third time we're checking to
make sure we have the correct service. This becomes more handy later
when there are many characteristics and many services.
We call peripheral.discoverCharacteristics with an array of UUIDs for the characteristics we're looking for. They're all the UUIDs that we defined in ParticlePeripheral.swift.
Finally, we handle the didDiscoverCharacteriscsFor event. We iterate through all the available characteristics. As we iterate we compare with the ones we're looking for.
// Handling discovery of characteristicsfuncperipheral(_ peripheral:CBPeripheral, didDiscoverCharacteristicsFor service:CBService, error:Error?){iflet characteristics = service.characteristics {for characteristic in characteristics {if characteristic.uuid ==ParticlePeripheral.redLEDCharacteristicUUID {print("Red LED characteristic found")}elseif characteristic.uuid ==ParticlePeripheral.greenLEDCharacteristicUUID {print("Green LED characteristic found")}elseif characteristic.uuid ==ParticlePeripheral.blueLEDCharacteristicUUID {print("Blue LED characteristic found");}}}}
At this point we're ready to do a full device discovery
of our Particle Mesh device. In the next section we'll test what we have
to make sure things are working ok.
Testing our minimal example
Before we get started, if you run into trouble I've put some troubleshooting steps in the footnotes. To test, you'll have to have an iPhone with Bluetooth Low Energy. Most modern iPhones have it. The last iPhone not to have it I believe was either the iPhone 4 or 3Gs. (so you're likely good)
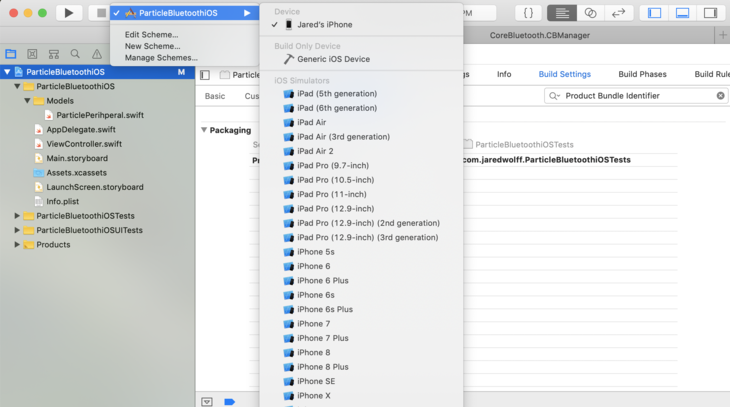
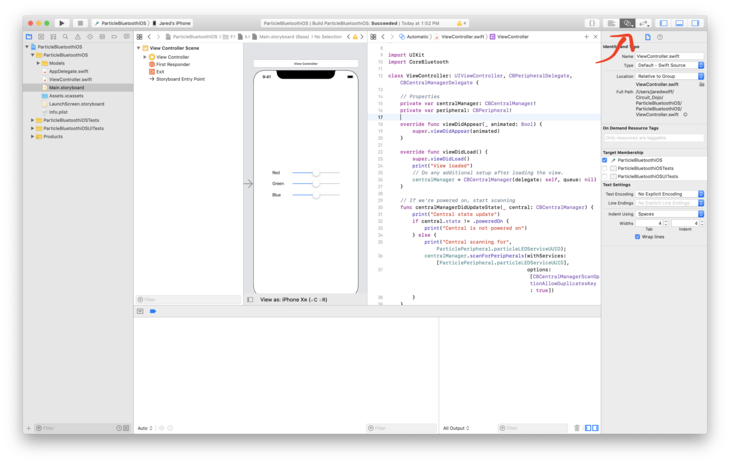
First, plug it into your computer.
Go to the top by the play and stop buttons. Select your target device. In my case I chose my phone (Jared's iPhone). You can also use an iPad. Then you can hit Command + R or hit that Play button to load the app to your phone.
Make sure you have your log tab open. Enable it by clicking the bottom pane button in the top right corner. Make sure you have a mesh device setup and running the example code. You can go to this post to get it. Remember your Particle Mesh board needs to be running device OS 1.3.0 or greater for Bluetooth to work!
Once both the firmware and app is loaded, let's check the log output.
It should look something like this:
View loaded
Central state update
Central scanning for B4250400-FB4B-4746-B2B0-93F0E61122C6
Connected to your Particle Board
LED service found
Red LED characteristic found
Green LED characteristic found
Blue LED characteristic found
This means that your Phone has connected, found the LED
service! The characteristics also being discovered is important here.
Without those we wouldn't be able to send data to the mesh device.
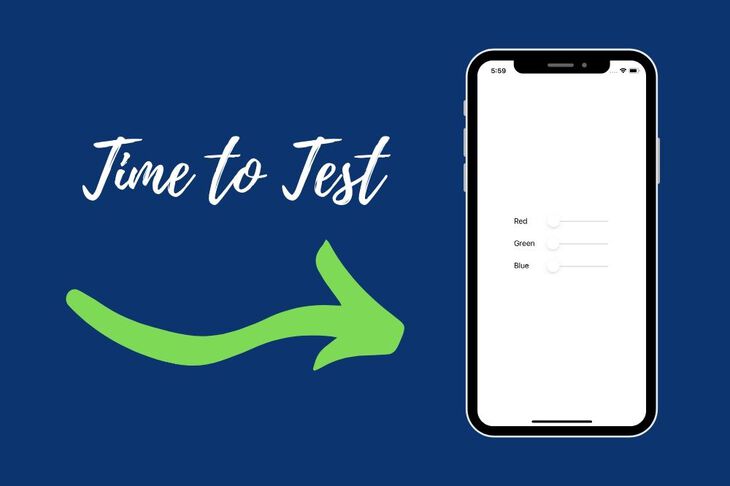
Next step is to create some sliders so we can update the RGB values on the fly.
Slide to the left. Slide to the right.
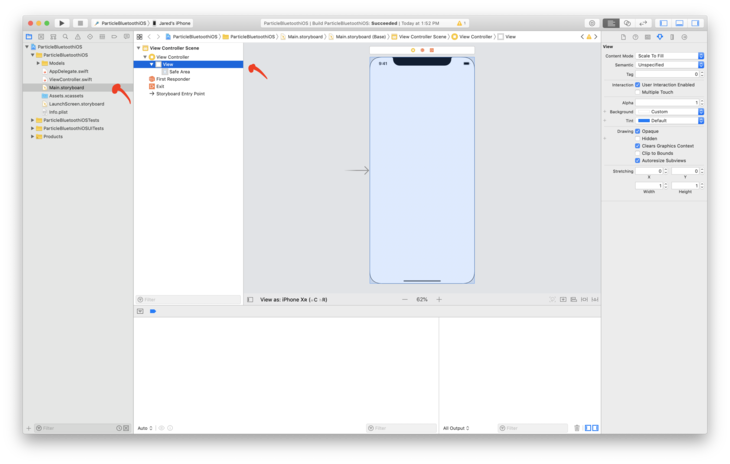
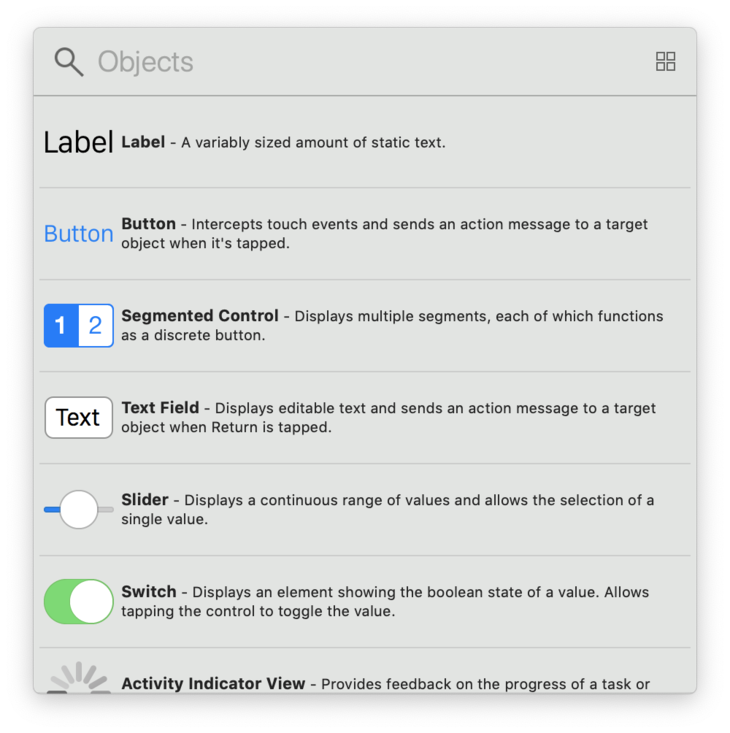
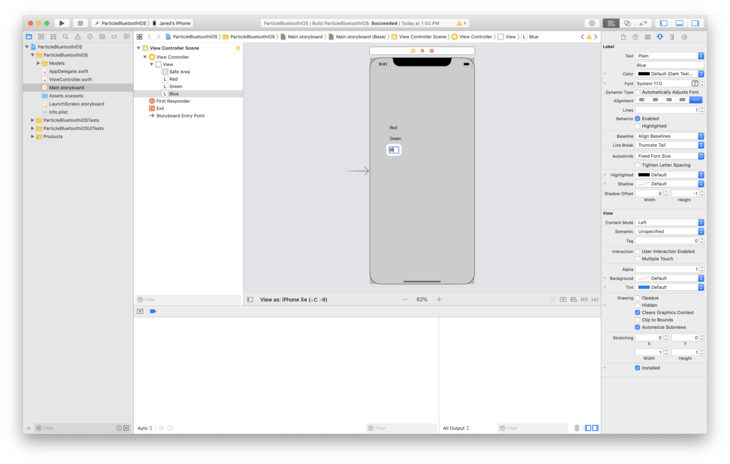
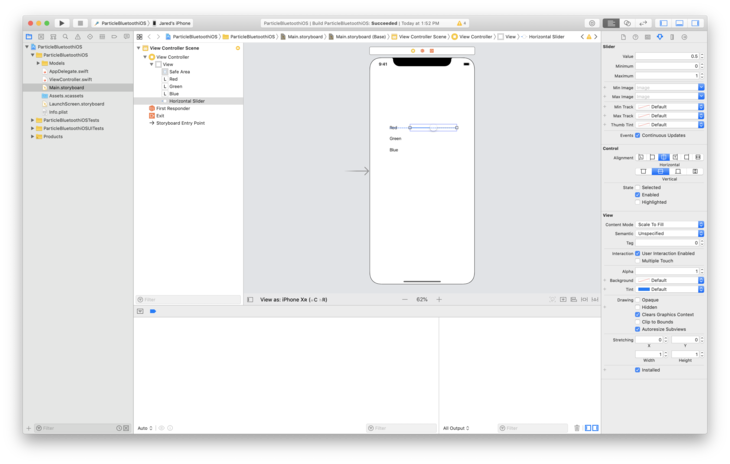
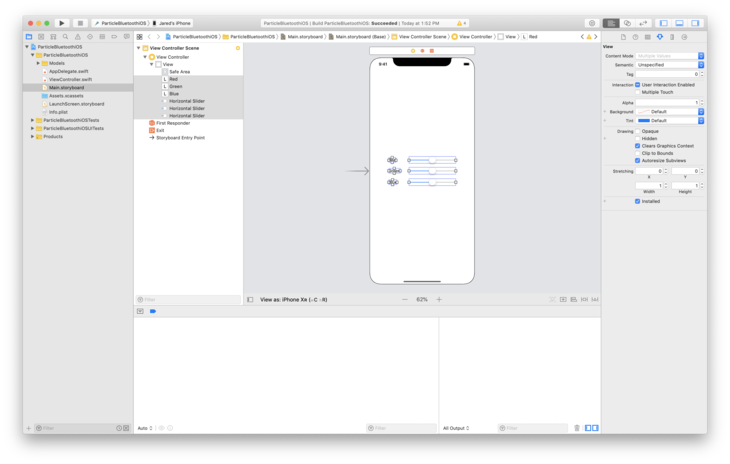
Next we're going to add some elements to our Main.storyboard. Open Main.storyboard and click on the View underneath View Controller. Then click on the Library button. (It looks like the old art Apple used for the home button) You'll get a pop-up with all the choices that you can insert into your app. Drag three Labels and copy three Sliders to your view. You can double click on the labels and rename them as you go. If you click and hold, some handy alignment tools will popup. They'll even snap to center! You can also select them all and move them together. We'll align them vertically and horizontally.
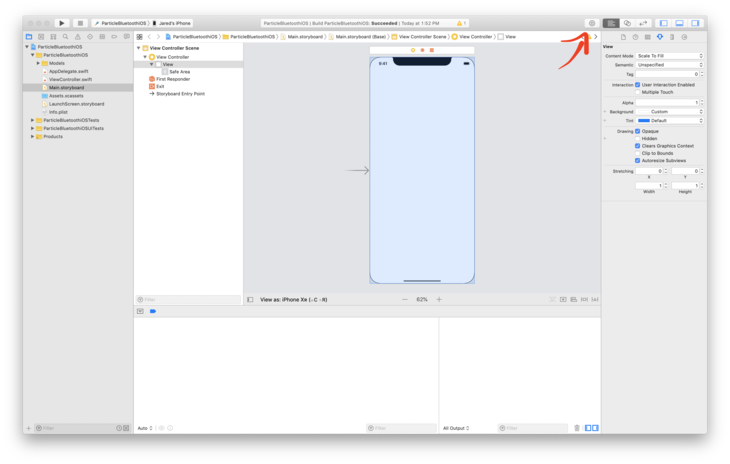
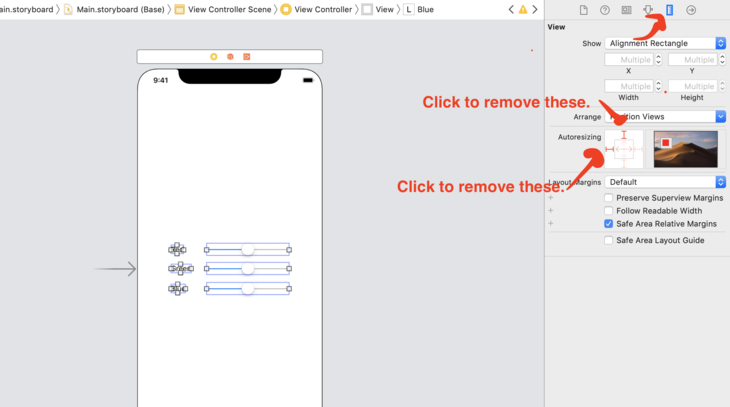
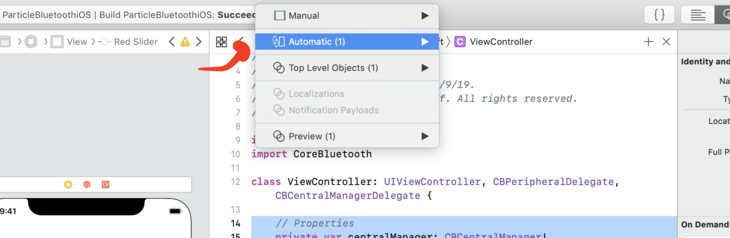
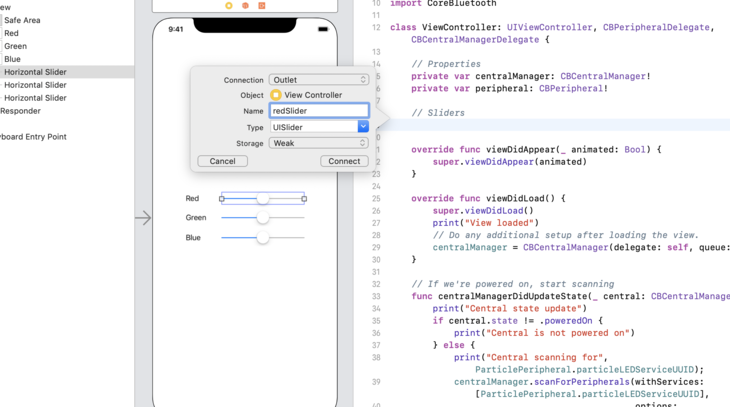
In order for them to stay in the middle, let's remove the autoresizing property. Click the Ruler icon on the top right. Then click each of the red bars. This will ensure that your labels and sliders stay on the screen! Next let's click the Show Assistant Editor button. (Looks like a Venn diagram) Note: make sure that ViewController.swift is open in your Assistant Editor. Then underneath the /properties section, Control-click and dragthe Red Slider into your code. Repeat with all the other ones. Make sure you name them something different. Your code should look like this when you're done:
This allow us to access the value of the sliders.
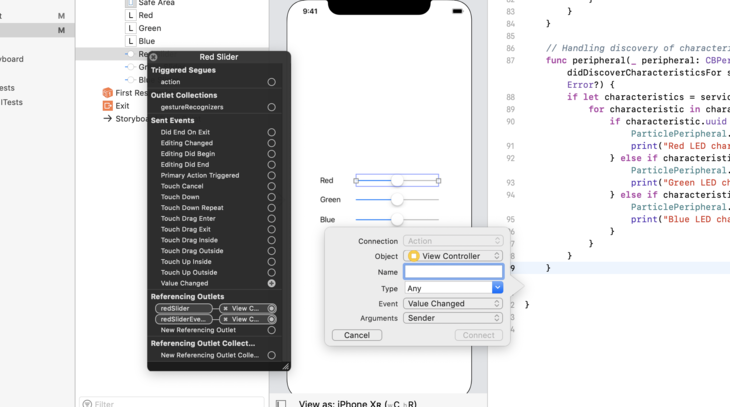
Next, let's attach the Value Changed event to each of the sliders. Right click on the Red Slider in the folder view. It should give you some options for events. Click and drag the Value Changed event to your code. Make sure you name it something that makes sense. I used RedSliderChanged for the Red Slider.
Repeat two more times. Your code should look like this at the end of this step:
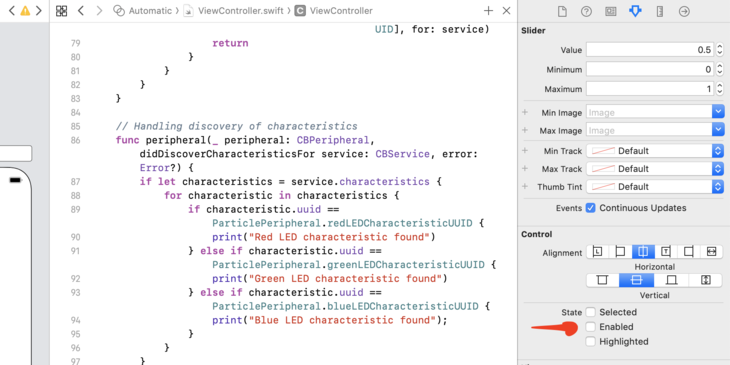
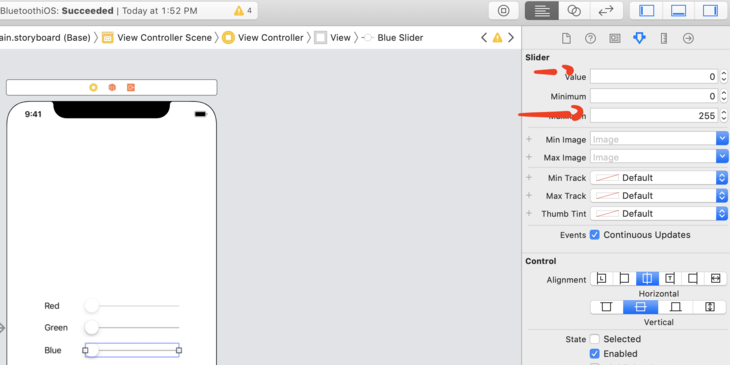
I've also selected each of the sliders to and un-checked Enabled. That way you can't move them. We'll enable them later on in code. Also, this is a great time to change the maximum value to 255. Also set the default value from 0.5 to 0. Back
at the top of the file. Let's create some local variables for each of
the characteristics. We'll use these so we can write the slider
variables to the Particle Mesh board.
Now, let's tie everything together!
In the didDiscoverCharacteristicsFor callback function. Let's assign those characteristics. For example
if characteristic.uuid ==ParticlePeripheral.redLEDCharacteristicUUID {print("Red LED characteristic found")
redChar = characteristic
As we find each characteristic, we can also enable each of the sliders in the same spot.
// Unmask red slider
redSlider.isEnabled =true
In the end your didDiscoverCharacteristicsFor should look like:
// Handling discovery of characteristicsfuncperipheral(_ peripheral:CBPeripheral, didDiscoverCharacteristicsFor service:CBService, error:Error?){iflet characteristics = service.characteristics {for characteristic in characteristics {if characteristic.uuid ==ParticlePeripheral.redLEDCharacteristicUUID {print("Red LED characteristic found")
redChar = characteristic
redSlider.isEnabled =true}elseif characteristic.uuid ==ParticlePeripheral.greenLEDCharacteristicUUID {print("Green LED characteristic found")
greenChar = characteristic
greenSlider.isEnabled =true}elseif characteristic.uuid ==ParticlePeripheral.blueLEDCharacteristicUUID {print("Blue LED characteristic found");
blueChar = characteristic
blueSlider.isEnabled =true}}}}
Now, let's update the RedSliderChangedGreenSliderChanged and BlueSliderChanged functions. What we want to do here is update the characteristic associated with the Changed function. I created a separate function called writeLEDValueToChar. We'll pass in the characteristic and the data.
privatefuncwriteLEDValueToChar( withCharacteristic characteristic:CBCharacteristic, withValue value:Data){// Check if it has the write propertyif characteristic.properties.contains(.writeWithoutResponse)&& peripheral !=nil{
peripheral.writeValue(value,for: characteristic, type:.withoutResponse)}}
Now add a call to writeLEDValueToChar to each of the Changed functions. You will have to cast the value to a Uint8. (The Particle Mesh device expects an unsigned 8-bit number.)
Repeat this for GreenSliderChanged and BlueSliderChanged. Make sure you changed red to green and blue for each!
Finally, to keep things clean, i've also added a function that handles Bluetooth disconnects.
Alright! We just about ready to test. Let's move on to the next (and final) step.
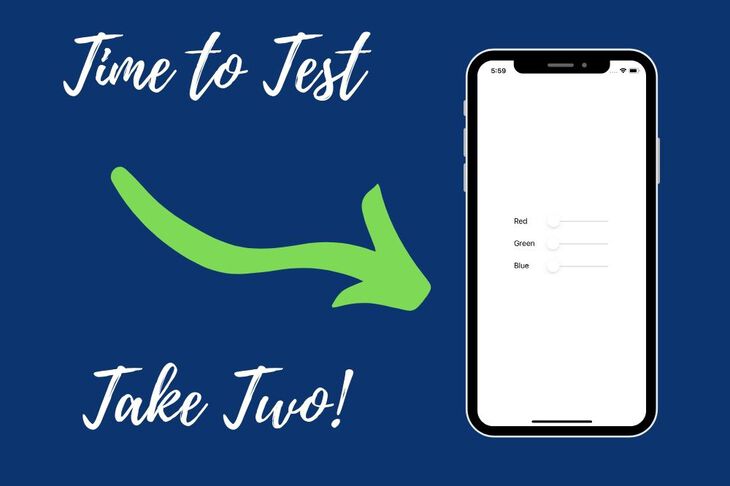
Test the sliders.
The hard work is done. Now it's time to play!
The easiest way to test everything is to click the Play button in the top left or the Command + R
keyboard shortcut. Xcode will load the app to your phone. You should
see a white screen proceeded by a screen with your sliders!
The
sliders should stay greyed out until connected to your Particle Mesh
board. You can check your log output if the connection has been
established.
View loaded
Central state update
Central scanning for B4250400-FB4B-4746-B2B0-93F0E61122C6
Connected to your Particle Board
LED service found
Red LED characteristic found
Green LED characteristic found
Blue LED characteristic found
(Look familiar? We're connected!)
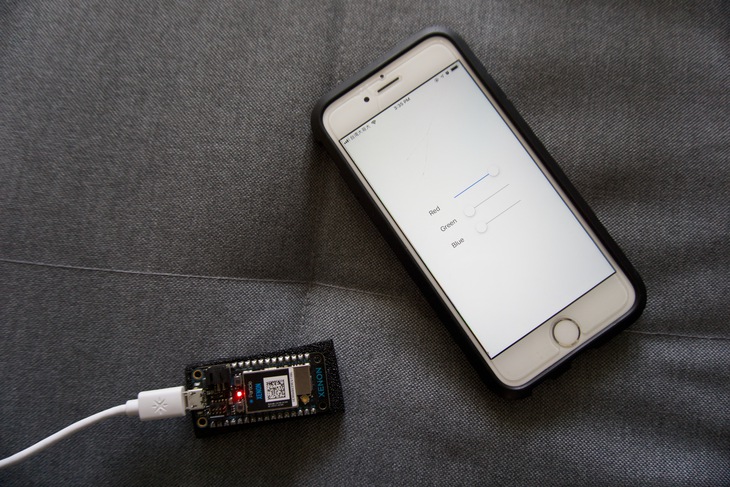
If you followed
everything perfectly, you should be able to move the sliders. Better
yet, the RGB LED on the Particle Mesh board should change color.
Conclusion
In
this article you've learned how to connect your Particle Mesh board and
iOS device over Bluetooth. We've learned how to connect to each of the
available characteristics. Plus, on top of it all, make a clean
interface to do it all in.
As you can imagine, you can go down the rabbit hole with Bluetooth on iOS. There's more coming in my upcoming guide: The Ultimate Guide to Particle Mesh. Subscribers to my list get access to pre-launch content and a discount when it comes out! Click here to get signed up.
Code
The full source code is available on Github. If you find it useful, hit the star button. ⭐️
Hack The Box (HTB) is an online platform allowing you to test your penetration testing skills. It contains several challenges that are constantly updated. Some of them simulating real world scenarios and some of them leaning more towards a CTF style of challenge. Note . Only write-ups of retired HTB machines are allowed. Devel is described as a relatively simple box that demonstrates the security risks associated with some default program configurations. It is a beginner-level machine which can be completed using publicly available exploits. We will use the following tools to pawn the box on a Kali Linux box nmap zenmap searchsploit metasploit msfvenom Step 1 - Scanning the network The first step before exploiting a machine is to do a little bit of scanning and reconnaissance. This is one of the most important parts as it will determine what you can try to exploit afterwards. It is always better to spend more time on that phase to get as much information as po...
Create a UI System in Unity that is completely Re-usable using C# What you’ll learn You will learn how to build a reusable UI System in C# and Unity 2017 You will understand how to create reusable animations with Mechanim Understand why and how to set up a good UI grouping structure Requirements You should be comfirtable creating Unity UI Elements You must have some experience with Unity and Unity C# A desire to look at ways in which to make your code more reusable Description Have you had some experience with setting UI’s inside of Unity? Would you like to know how to make a set of scripts that you can re-use between each project? Then this course is for you! Throughout each of the lectures we focus on how we can build a re-usable UI System. One in which you can extend and modify to your project needs. We will walk through step by step and build up the components to make a fully modular UI system for Unity 2017! By the end you will have a basic r...
Update on April 30, 2019: Jonathan Cornelissen will be stepping down as the chairperson of DataCamp’s Board of Directors, in addition to stepping down from his role as CEO of DataCamp for an indefinite leave of absence without pay, effective May 1, 2019. Mr. Cornelissen will also be recused from the independent third party review described below and any decisions relating to his future role at DataCamp. To Our Community Update on April 30, 2019: Jonathan Cornelissen will be stepping down as the chairperson of DataCamp’s Board of Directors, in addition to stepping down from his role as CEO of DataCamp for an indefinite leave of absence without pay, effective May 1, 2019. Mr. Cornelissen will also be recused from the independent third party review described below and any decisions relating to his future role at DataCamp. To Our Community As the DataCamp Board of Directors, we want to assure our community we are taking the incident from October 2017, involving ou...
Comments
Post a Comment