Alexa and Google Home: How to Build your own Voice Apps and Deploy Them to Millions of Devices Around the World
Voice apps completely change the way we interact
with the digital world. Voice adds another dimension to human-computer
interaction that developers are only beginning to explore.
In this
article, I will show you how you can use your existing backend
architecture & APIs, connecting them with your voice apps to offer a
new experience to your customers. Voice apps borrow a lot from our
general development process, not requiring separate development
resources.
We will build this for Voice apps (Alexa and Google). We will be using the platform VoiceFlow, which allows us to build voice apps visually.
Voiceflow Tutorial
VoiceFlow is a visual way to create voice apps, and is very easy to use and understand.
Firstly, create an account there to get started.
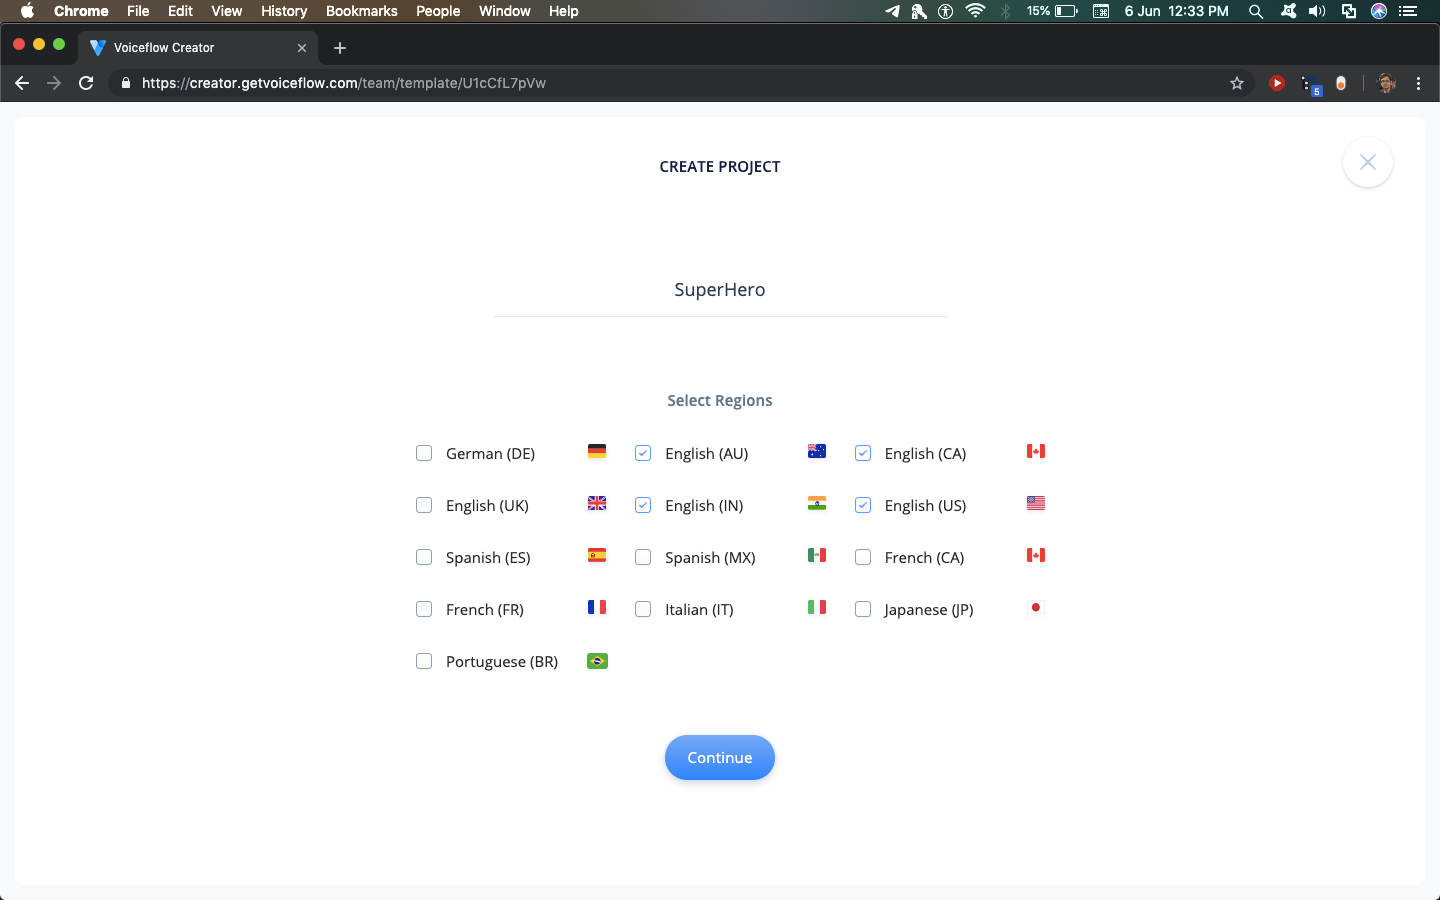
After
creating an account, create a new project, giving it an appropriate
name. For the purpose of this tutorial, we have chosen all English
regions as deployment regions.
You
will end up on a blank canvas after this. Don't be overwhelmed by all
the options present on the screen, this tutorial will guide you through
all the relevant blocks required.
In the blocks submenu on the
left, you will see several blocks which can be used to build an Alexa or
Google skill. Each block performs a certain function, and Voiceflow is
based on building Voice apps by combining these blocks.
1. Speak Block
The
first block that we will use is the Speak Block. We will use it to make
Alexa say something to the user. Drag a speak blog onto the canvas,
rename it to Introduction and write a suitable introduction to your app
in the text area. I will use "Welcome to Superhero! Say the name of a
hero to search!".
At any point, test out your app by clicking on the Play Button.
2. Capture Block
The next block we will use is the Capture block. It is used to capture data from the user's voice and store it into a variable.
Firstly,
create a new variable in the 'Variables' submenu on the left by typing a
name and pressing enter. Use the name 'hero' for now.
Adding a capture block, name "Input Type" as "Actor" and "Capture input To" as "hero".
Add
a speech block after it, saying : "Searching for {hero}. <break
time='2s' /> ". We use curly brackets to use a variable in speech. Be
sure to enter {hero} by hand so that Voiceflow detects it as a
variable. The <break time='2s' /> is a tag which is part of a
language called Speech Synthesis Markup Language (SSML). You can read
more about it on Amazon's official documentation page.
3. API Block
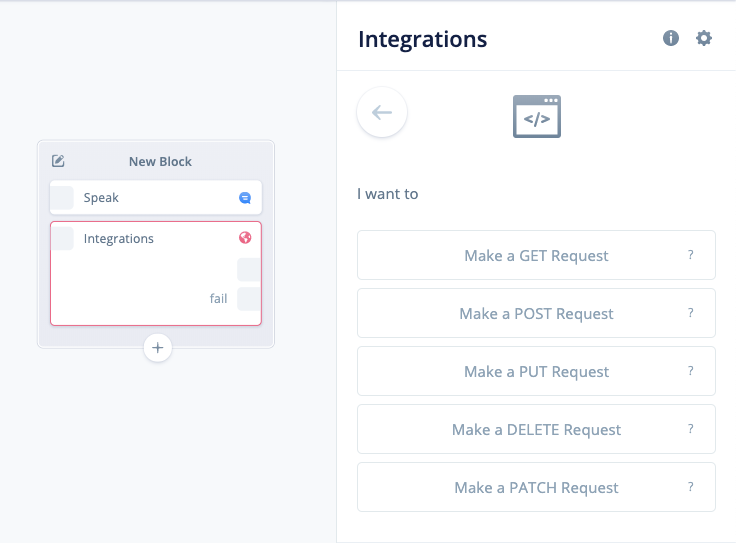
Click
on the Plus icon below your Speak block to add another step to the
block. Add an Integration block from the list. After that, click on the
integration block & set up the options in this order:
Choose an integration - "Custom API" since we will be using a custom API to get some data.
2. I want to - "Make a GET request" since we are using a GET request to get JSON data from an API.
We will use a custom API (https://super-search-akashjoshi.flexiple.now.sh/?hero=)to get the superhero data.
Try navigating to https://super-search-akashjoshi.flexiple.now.sh/?hero=superman in your browser to see what kind of data is returned by the API. Replace superman with any hero that you want to search for.
We replace the hero name with the {hero} variable so that the API fetches the desired hero correctly.
Paste https://super-search-akashjoshi.flexiple.now.sh/?hero={hero}
into the URL bar. Be sure to type in {hero} by yourself so that Voiceflow detects it as a variable.
However, we aren't done yet. Click on Test Integration to test the API call.
The response from the API has to be mapped into output variables so that they are spoken to the user.
Add variables for name, fullName, born, alignment, work & base from the variables side-bar.
Copy
the output path of the JSON file by clicking on the response tab of the
Test Integration tab and paste it into the output menu. Do this for all
of the following - name, fullName, born, alignment, work & base.
Check the short video below to understand how to map the JSON output with your Voiceflow variables:
In
the image above, we can see that the Integration has 2 outputs, one
without a prefix text, and one with fail as prefix. The one without the
prefix text is a success state output, and the one with fail output is
when our API call fails.
Add a speech block saying 'The hero was
not found' connected to the fail state. If the API succeeds and a hero
was found matching the {hero} variable, all the output variables will be
set with the correct values. Otherwise, they will be to the default
value of 0.
4. If Block
Add an if block to the canvas, and check whether fullName = 0. If it is 0, connect it to the "Not Found" block.
Watch the short video below to understand how to add conditions to If blocks:
Else,
the hero was found. So, speak the hero name by writing in a speech
block: "Their hero name is {name}. Their full name is {fullName}. They
were born in {born}. They are {alignment}. They work as a {work} from
{base}. <break time='3s' /> Do you want to search another hero?"
Again, be sure to type in the variable names so that Voiceflow detects them as variables.
To
clear out the variables after the skill completes, add a "Set" block to
the canvas and set fullName to 0. This step is necessary, because if
the variables are not cleared, the previous answer will be repeated by
the skill!
5. Choice Block
We
shouldn't end the skill here. We should allow the user a choice on
whether they want to search for another superhero. Change the text in
the "Not Found" block to ask whether the user wants to search for more
at the end.
Add a Choice block to the canvas. The choice block
allows us to perform certain actions based on user voice. This block
checks whether the user wants to search for another hero. Enter synonyms
of Yes for searching further.
For else, add a Flow block, selecting Stop Flow as a flow.
Connect
the ' 1 ' output of the Choice block to a speech block asking user to
say another Hero name, and connect it to the Capture block. Look at the
image below to understand how it's done.
And we are done! Test out your app by clicking on the play button.
6. Deployment
a. Alexa
To
deploy your app to the Alexa platform, click on the Publish tab,
connect your Amazon developer account and fill the form options
according to relevance to your skill (like Description, Skill Name,
etc.)
Be sure not to change any of the default invocations that may break your skill during deployment and cause you to resubmit it.
In
case you get some part wrong while submitting, the review process is
very helpful & they will let you know what went wrong in the
submission. b. Google
Click on the instruction link to see instructions to add the Google Assistant file to Voiceflow. After adding the file, follow the publish to production guide from here . Few caveats in the Google deployment process:
Your
invocation name cannot have any keywords which may be used during
invocation. Eg, you cannot name the action 'Superhero Search', because
'Search' may be used as a invocation name.
You need to add a
custom privacy policy from Google. You can't use the one from Voiceflow
as it has mentions of Alexa or skills, which will cause your action to
be declined. You can use a template I built here. It has instructions on how to write your privacy policy and where to keep it.
The
final point would be to not use the term 'Alexa' or 'skill' at any
point in your action description or within the app. If there are any
occurrences in the app, replace them with something more generic so you
can use the same codebase for Alexa & Google. Replace 'Alexa' &
'skill' with 'Google' & 'actions' in the description and similar
places.
Hack The Box (HTB) is an online platform allowing you to test your penetration testing skills. It contains several challenges that are constantly updated. Some of them simulating real world scenarios and some of them leaning more towards a CTF style of challenge. Note . Only write-ups of retired HTB machines are allowed. Devel is described as a relatively simple box that demonstrates the security risks associated with some default program configurations. It is a beginner-level machine which can be completed using publicly available exploits. We will use the following tools to pawn the box on a Kali Linux box nmap zenmap searchsploit metasploit msfvenom Step 1 - Scanning the network The first step before exploiting a machine is to do a little bit of scanning and reconnaissance. This is one of the most important parts as it will determine what you can try to exploit afterwards. It is always better to spend more time on that phase to get as much information as po...
Create a UI System in Unity that is completely Re-usable using C# What you’ll learn You will learn how to build a reusable UI System in C# and Unity 2017 You will understand how to create reusable animations with Mechanim Understand why and how to set up a good UI grouping structure Requirements You should be comfirtable creating Unity UI Elements You must have some experience with Unity and Unity C# A desire to look at ways in which to make your code more reusable Description Have you had some experience with setting UI’s inside of Unity? Would you like to know how to make a set of scripts that you can re-use between each project? Then this course is for you! Throughout each of the lectures we focus on how we can build a re-usable UI System. One in which you can extend and modify to your project needs. We will walk through step by step and build up the components to make a fully modular UI system for Unity 2017! By the end you will have a basic r...
Update on April 30, 2019: Jonathan Cornelissen will be stepping down as the chairperson of DataCamp’s Board of Directors, in addition to stepping down from his role as CEO of DataCamp for an indefinite leave of absence without pay, effective May 1, 2019. Mr. Cornelissen will also be recused from the independent third party review described below and any decisions relating to his future role at DataCamp. To Our Community Update on April 30, 2019: Jonathan Cornelissen will be stepping down as the chairperson of DataCamp’s Board of Directors, in addition to stepping down from his role as CEO of DataCamp for an indefinite leave of absence without pay, effective May 1, 2019. Mr. Cornelissen will also be recused from the independent third party review described below and any decisions relating to his future role at DataCamp. To Our Community As the DataCamp Board of Directors, we want to assure our community we are taking the incident from October 2017, involving ou...


Comments
Post a Comment